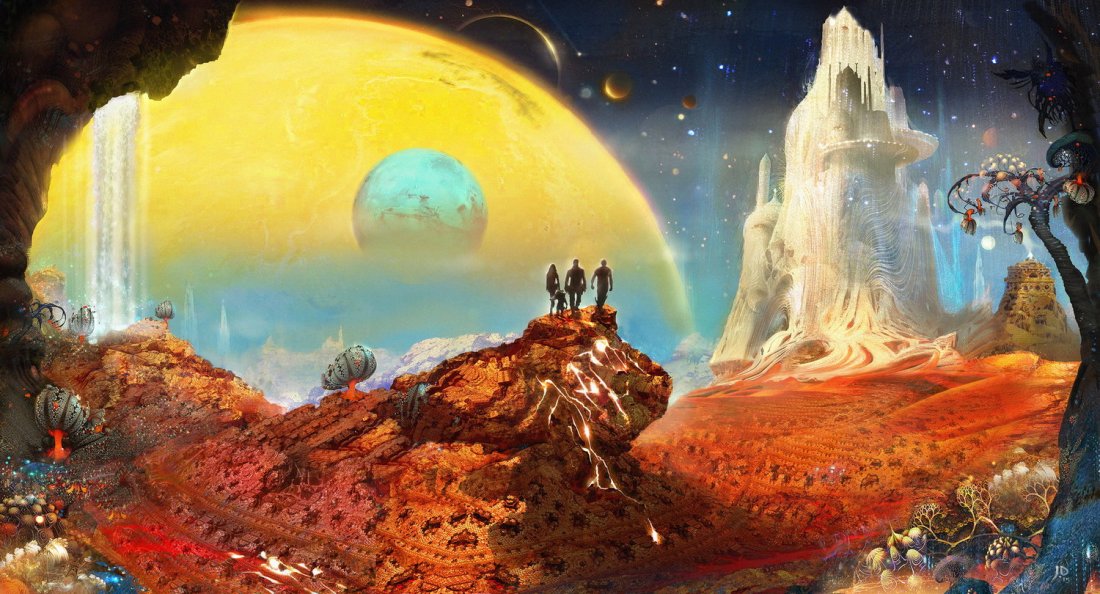
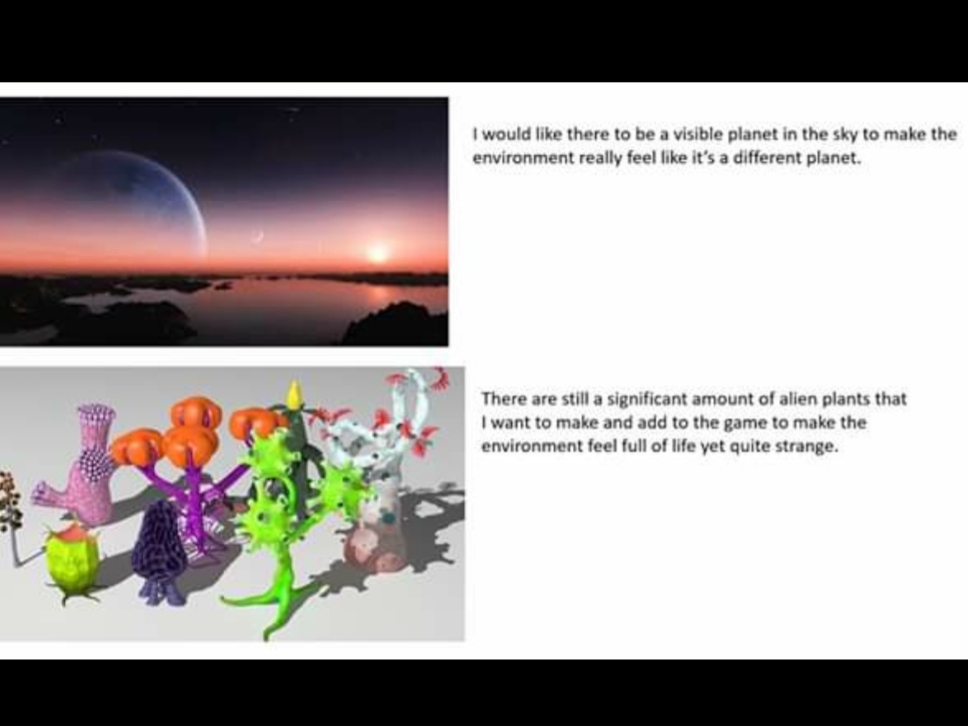
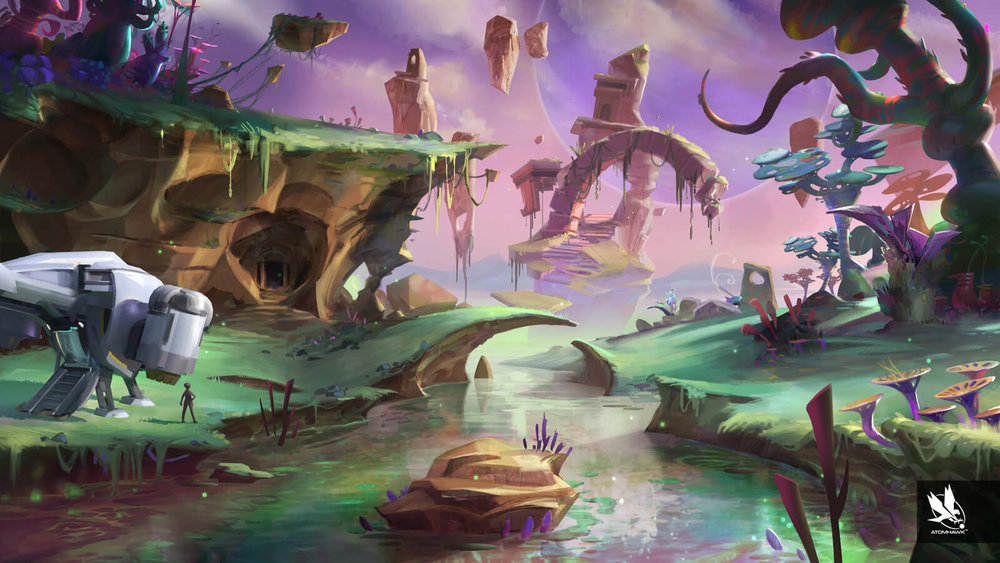
One of the things I would like to add to my game is the creature I previously made from my last project into this project and I would have liked to see it move around in this environment.As I am not able to make progress with my game at the moment I’m thinking of ideas that I would consider adding to the game if were able to make progress with it such as adding different coloured environments I’ve re-watched both the first and second guardians of the galaxy movies to try and and get a bit of inspiration from the environments in the movie’s and I’ve done a bit of research for some concept art and the image above is one of them. I’ve also played a bit of No Man’s Sky to get some inspiration as it is procedural generated exploration game that has almost an endless amount of planets and environments to explore and what I can get inspiration from.
Watching videos on YouTube such as this has helped me understand different ways to make models and make detailed models by using different techniques that I would have applied to my project.
This video would have helped me create smoke effects that I would have used on my spaceship model and escape pod to make them look damaged and add more detail to my game.
Just like the smoke system effect I would have liked to have added a spark effect to also add more detail to my spaceship and escape pod to make it look more damaged and make players easily identify that the spaceship is damaged and make the crash site look much better and make it look like there is more going on.
Because of certain circumstances we had to make a presentation of what we have done so far from home I made a presentation of what I have done so far using Microsoft Word because I wasn’t able to record a video. I then uploaded it to the Facebook group and I made a survey on survey monkey alongside it asking questions about my game.
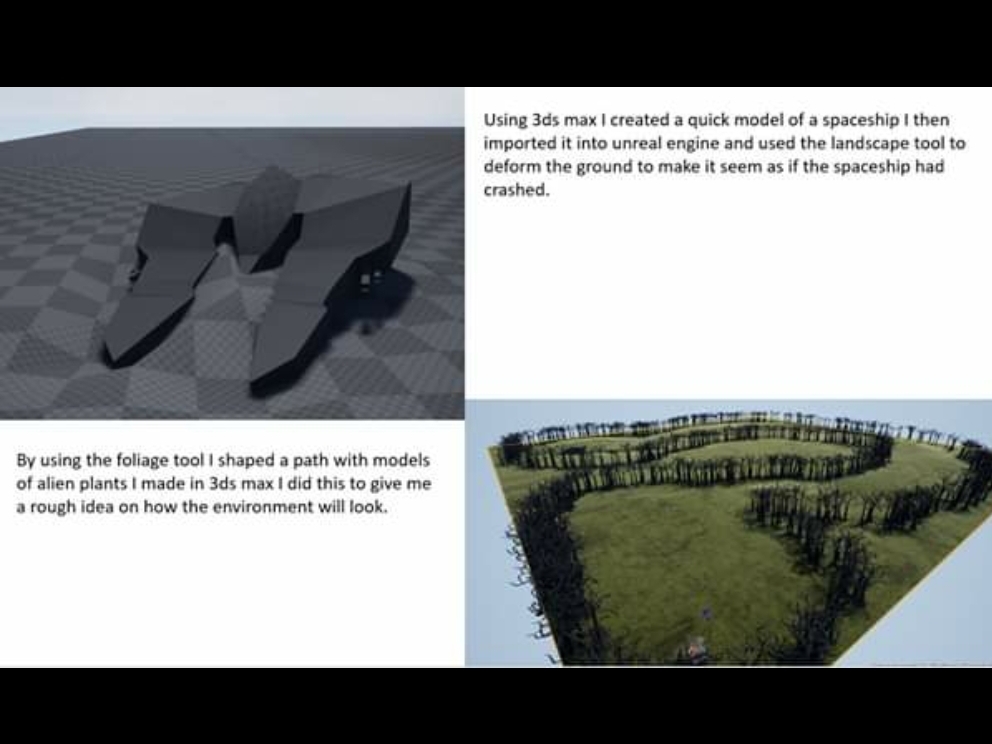
I’ve started to shape the path that the player will follow and started to make foliage like grass to add more detail to the game and make it feel more alive.
In pre-production I created a presentation stating all the things I want to do and what I need to do to accomplish making my game then once I put together my presentation I had to present it with the rest of the class to show what I’m doing, what I want to achieve and to get feedback from the rest of the class.
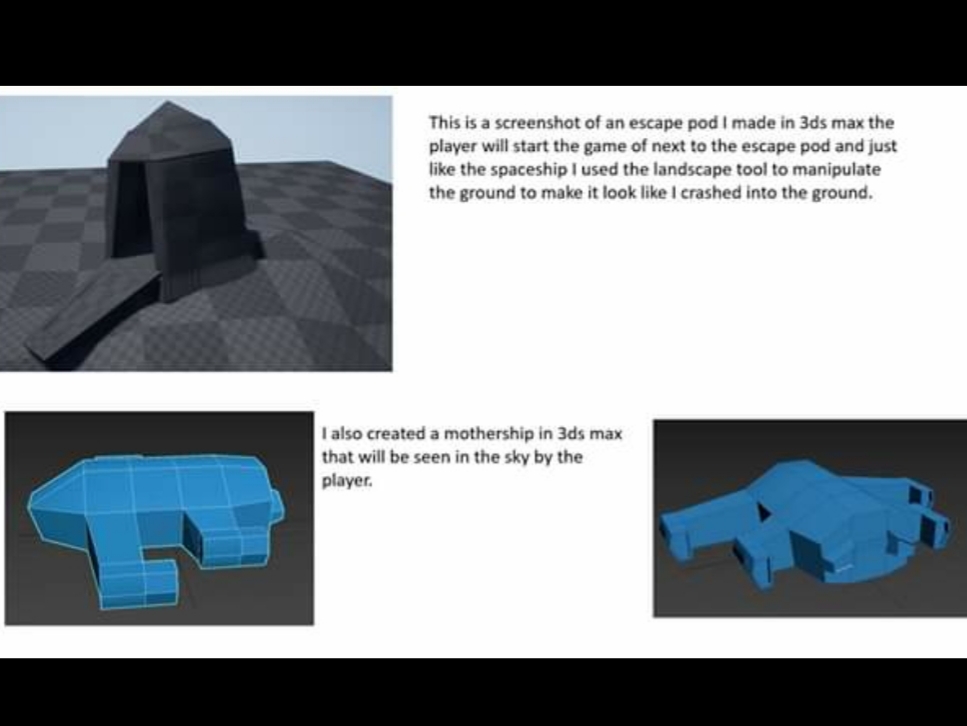
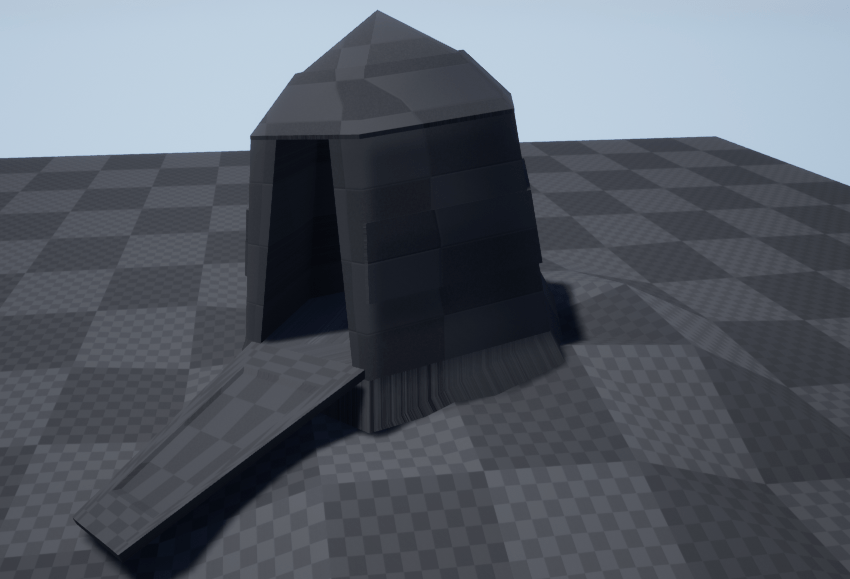
I began making my game starting with a simple model of an escape pod and door starting of with a low poly sphere and using extrude and moving around vertices and edges once I’ve put the environment together I’ll hopefully be able to make it more complex.
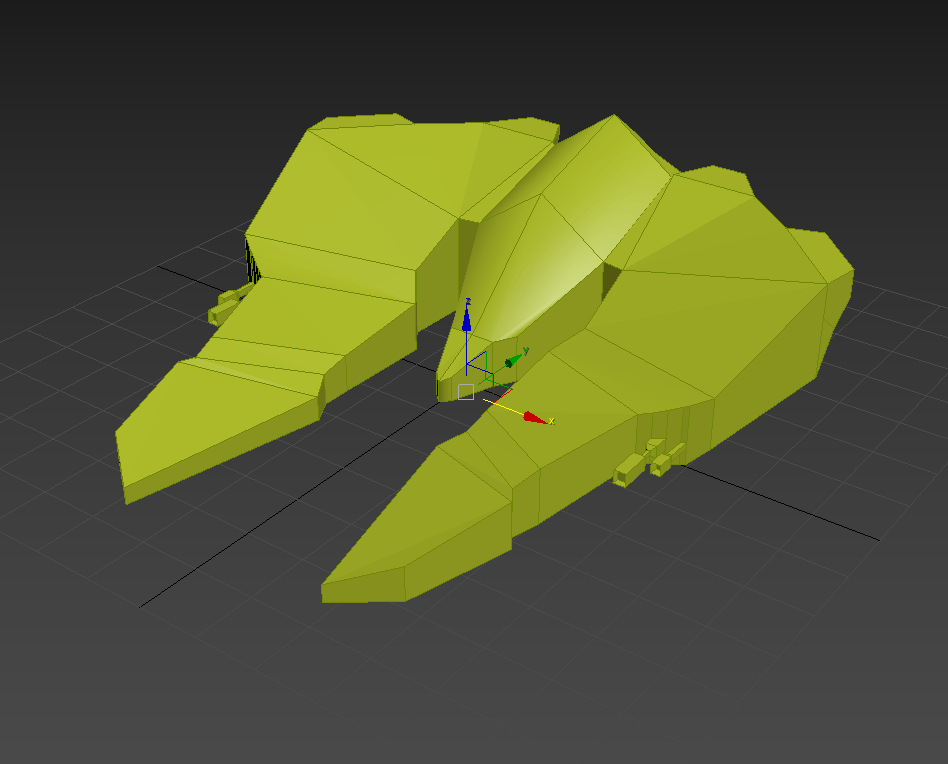
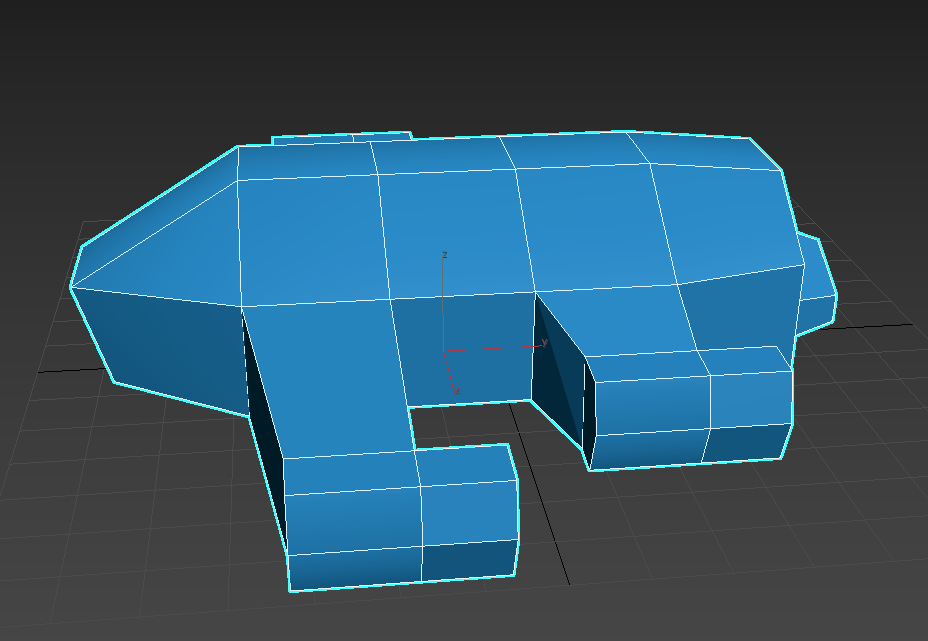
Once I made the escape pod I then imported a reference image of a spaceship and used it to guide me in making a semi complex spaceship.After creating the model and forming the shape I then began adding to it and shifting parts around to form my own design.This is what the model looked like once I completed it, I then exported it to unreal engine.
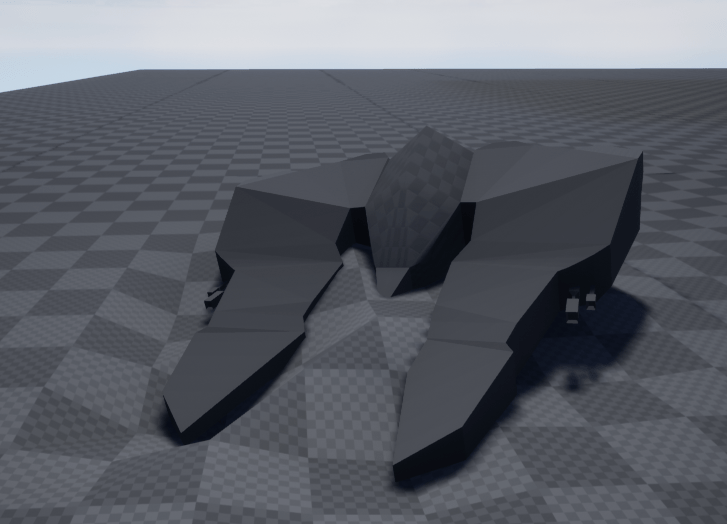
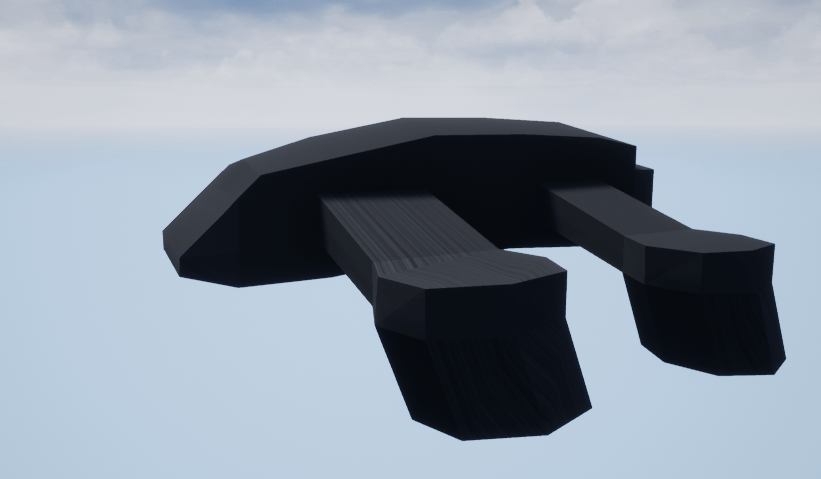
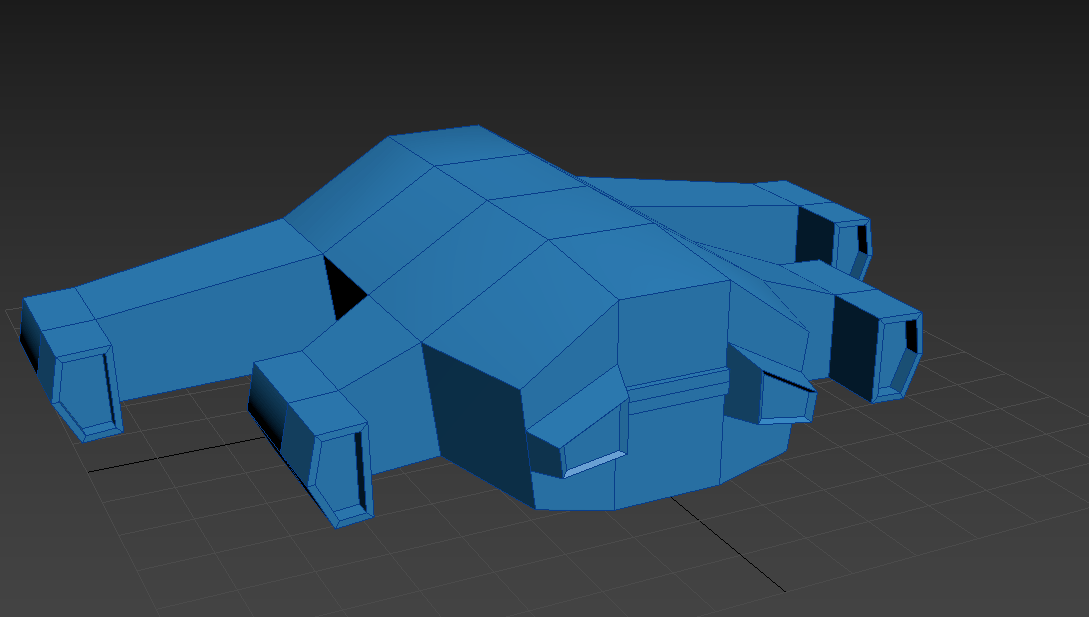
After I imported them in unreal I then scaled them and from the research I did in my own time I used the landscaping tool to make the ground uneven and indented to make it seem as if both models crashed into the ground.I then decided I wanted to implement a bigger spaceship into the game like a mother-ship to not only make my environment feel more full and exciting but to also give my game bit more story. This was the first iteration of the mother-ship but I wasn’t to happy with the shape so I then decided to change it and make another one although I wasn’t happy with the design I will be keeping it in the game for now.
Here is the second iteration of the mother-ship I was much happier with this design as it looks more complex and just overall has a better design
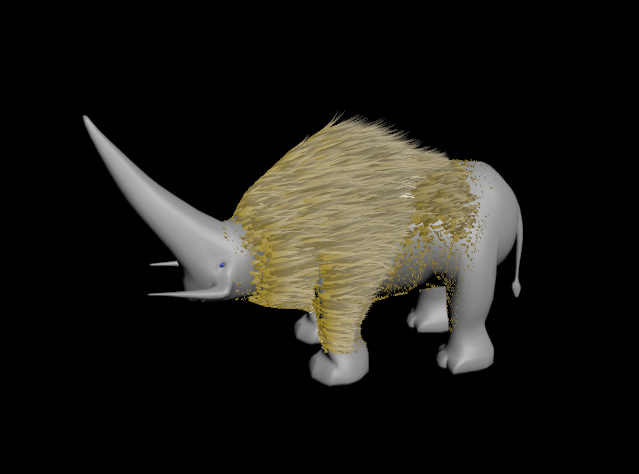
Throughout my time on the course I have learned a lot and gained and improved on many skills mainly 3D modelling which I began to get better at the more I focused on so because of that most of the projects I have done have been based on creating 3D models and have inspired me to become better and it has made it into a aspiration of mine to focus more on and improve on and possibly make it into a future career. When I started focusing more on 3D modelling initially I would mostly make objects and structure but in my most recent project I made a model of a creature which was out of my comfort zone because of its organic and symmetric shape once I had completed that model I’ve become more comfortable with making characters and creatures and with this final project I will be looking to apply this newly developed skill to make multiple different models of all kinds of shapes that will come together to form an environment that can tell its own story through the environment itself.
Project concept
At the moment my idea is to make a game that shows a bit of story and lore through the environment and possibly have some interactions within the environment I haven’t decided what kind of environment it will be yet but I am thinking it will be snow, desert or grass environment at the moment I’m thinking it will be an environment on a different planet as it will give me the opportunity to create multiple different things of my own design and really show of my creative thinking. When I started to think of this idea it reminded me a lot of No Man’s Sky which is a procedurally generated sandbox game where you can explore galaxies, planets and environments so because of the resemblance I will be doing research into No Man’s Sky and how it was made. I will also have to do some research on different plants and fictional worlds. In order to accomplish this I will also be using YouTube to help me with things I would like to do but don’t know how to do. In order to accomplish my idea I will be using 3ds max, Unreal engine and Photoshop I will be looking at tutorials in my own time to better my understanding and maximizing my time on this project so I can complete as much as possible.
Evaluation
I will reflect on my work through my blogs and keep track of what I’m doing by uploading screenshots, videos and keep track of tings I do in unreal engine and 3ds max and any other software I use to help make my game. This will also help to show of the progression of my work and any changes that I make and anything I need to do or want to do. I’ll also explain what I did, how I did it and what my goals are for each posts I make on my blog, I will also talk about anything that I learned or if I find a better way to do something or find any useful new tools that I’ve never used before.
Project action plan and timetable
In-order to keep within the time frame and keep track of everything I do for the project I will need to make a timetable to know how long I’m spending on different areas of my work and it will keep me aware of how much time I’m spending on certain areas and how much time I should be spending on it to maintain realism, organisation and allow me to successfully complete as much as possible before the deadline.
Proposed research sources and bibliography (Harvard format)
For research I will be looking at games such as No man’s sky and other games with off-world environments and websites like CGsociety, Sketchfab and CGTrader and I will also be using social media as well for inspiration I will refer back to things that I research through my bibliography on my blog and will continuously update it throughout my project.
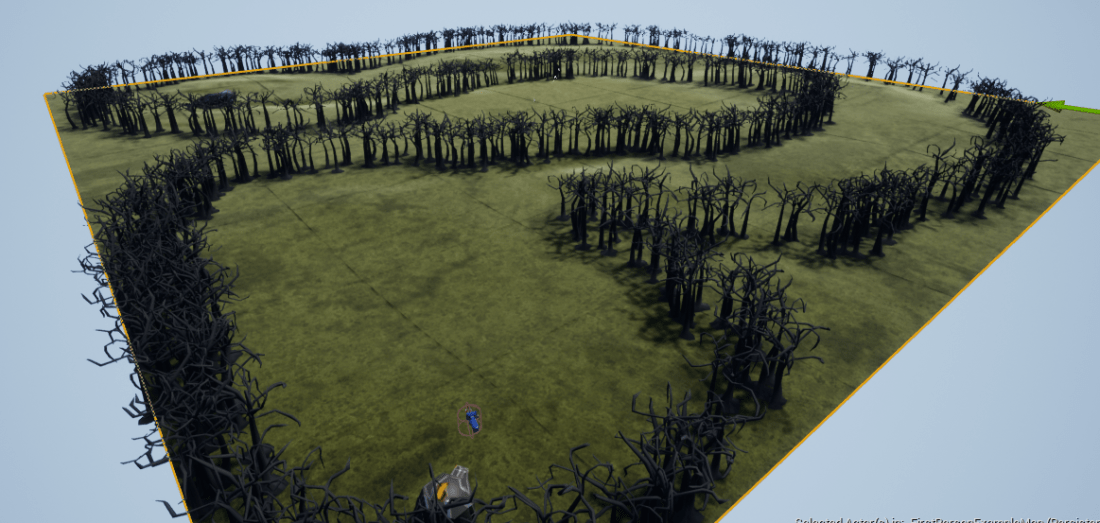
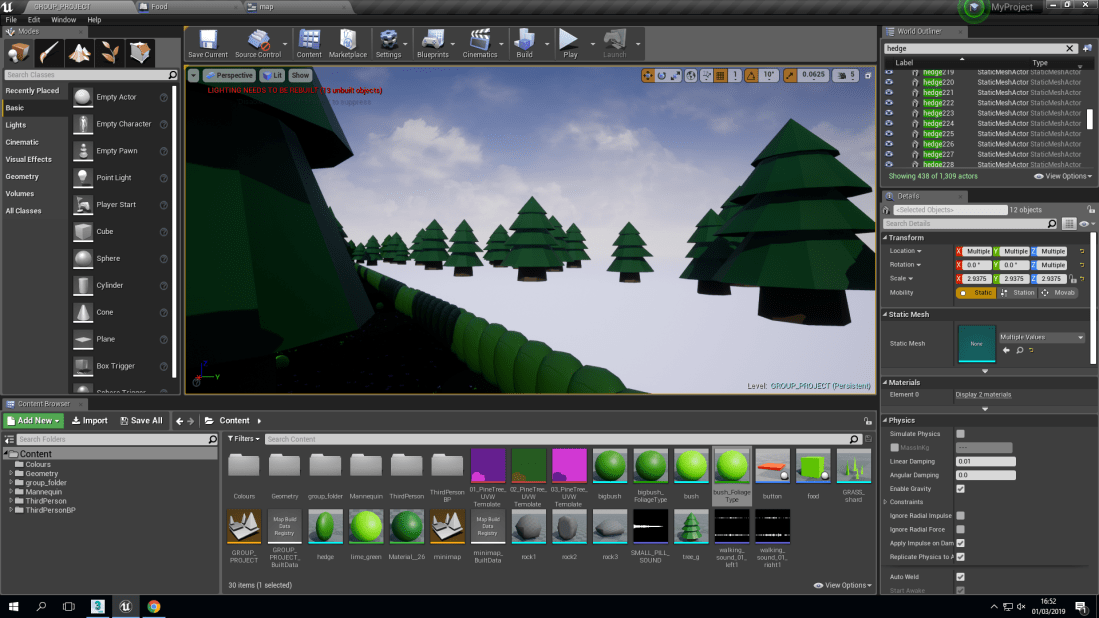
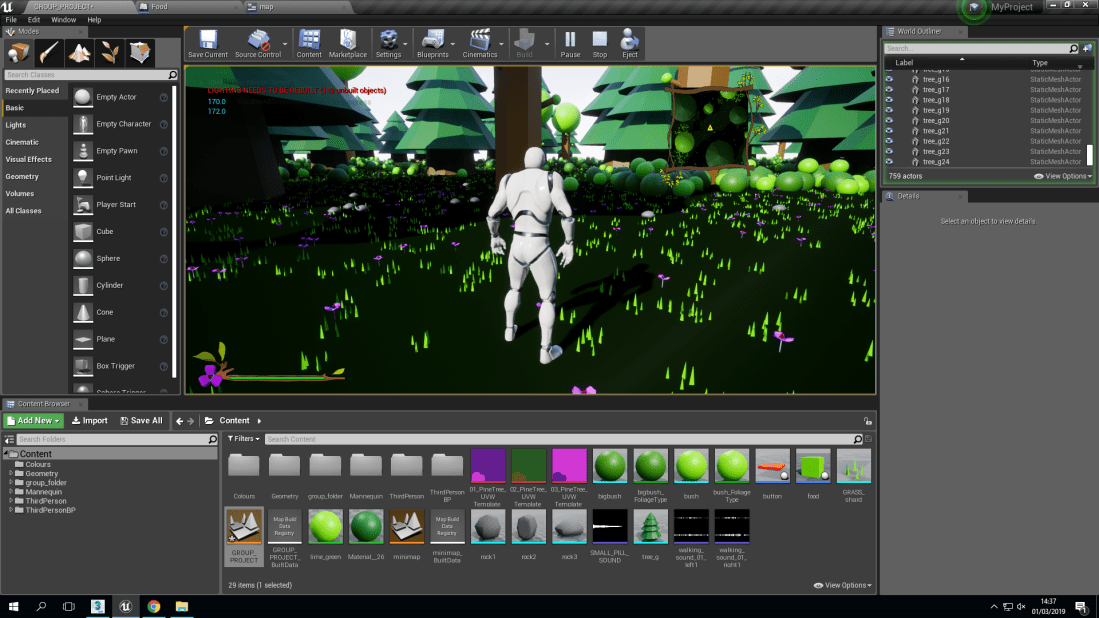
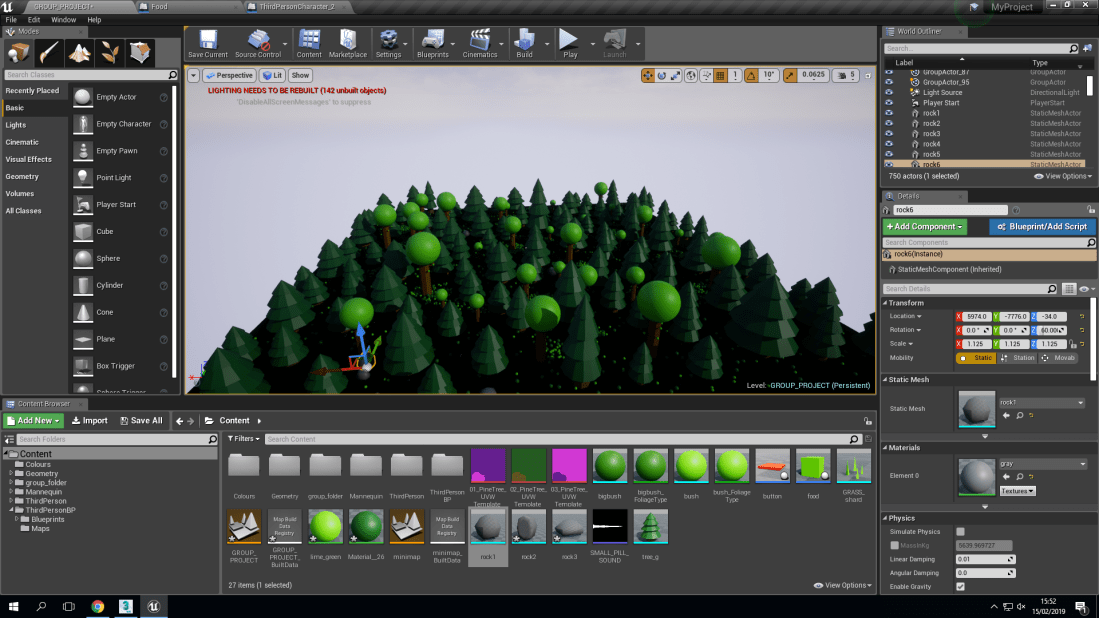
I have added hedge around the map in-order to stop the player from walking of the map and beyond the hedges I have added more trees to make the player believe that there is more to the world.
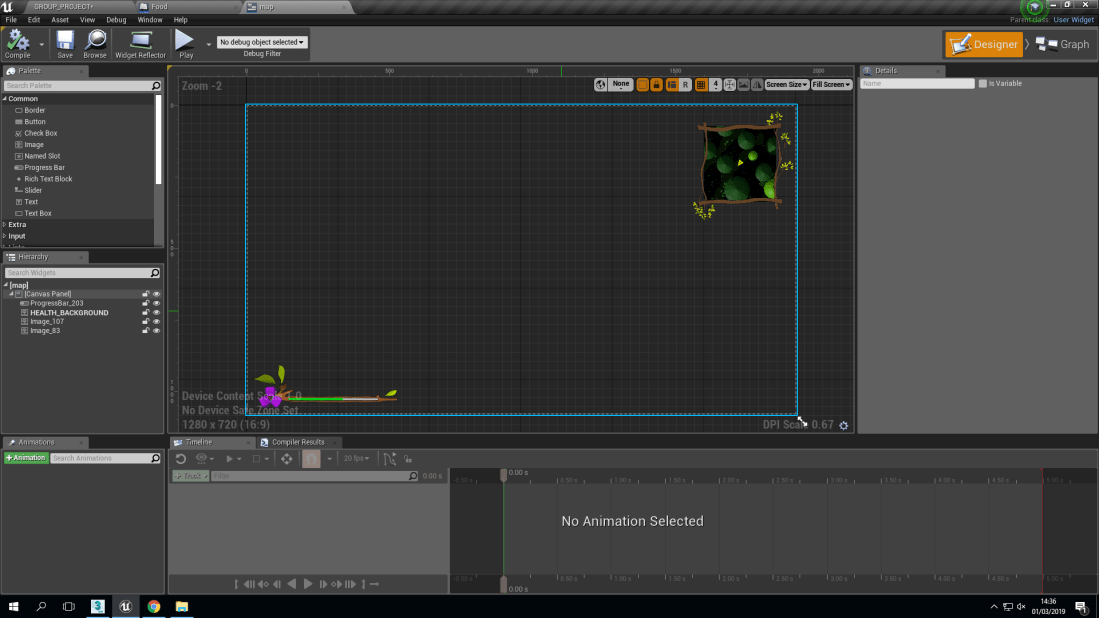
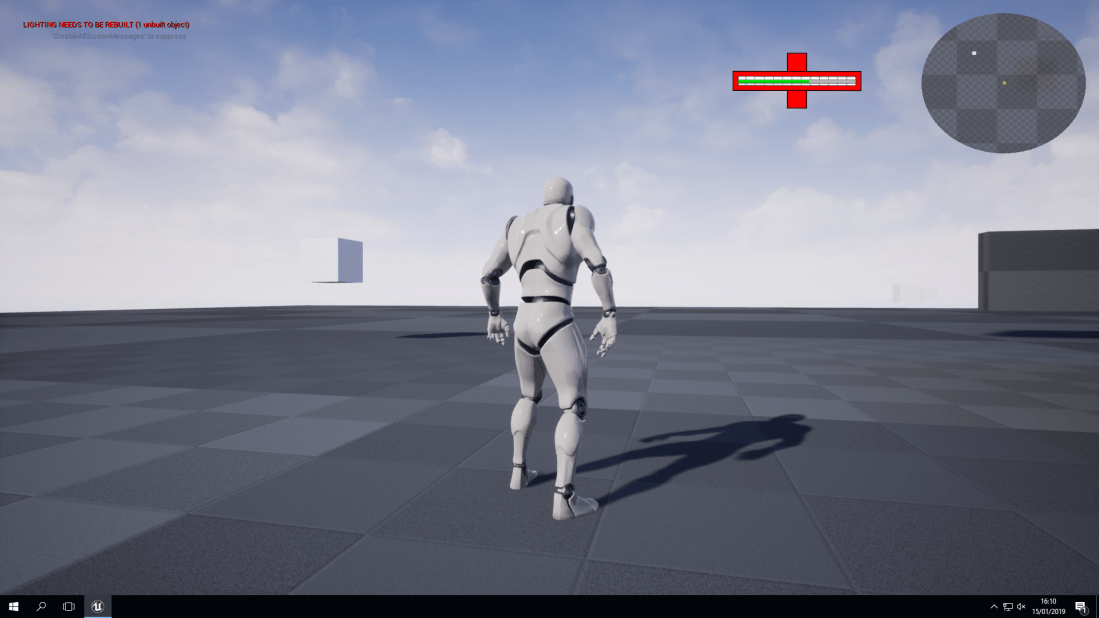
This is a link to the video of our project with working sound, health bar and mini-map
Here is a screenshot of the health bar and mini-map and what it looks like in the game.
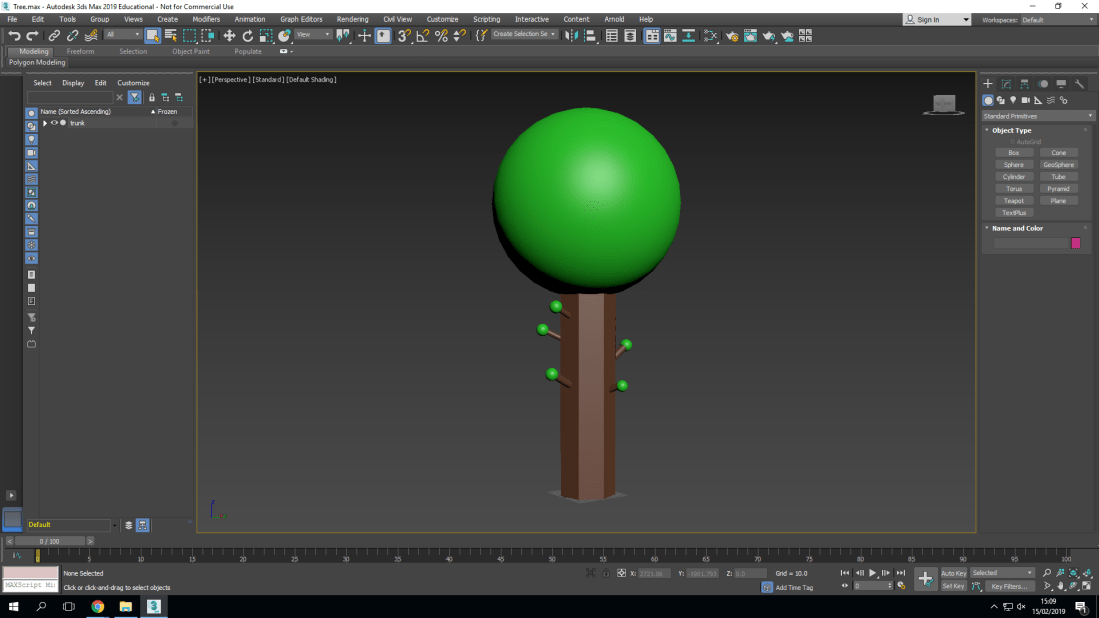
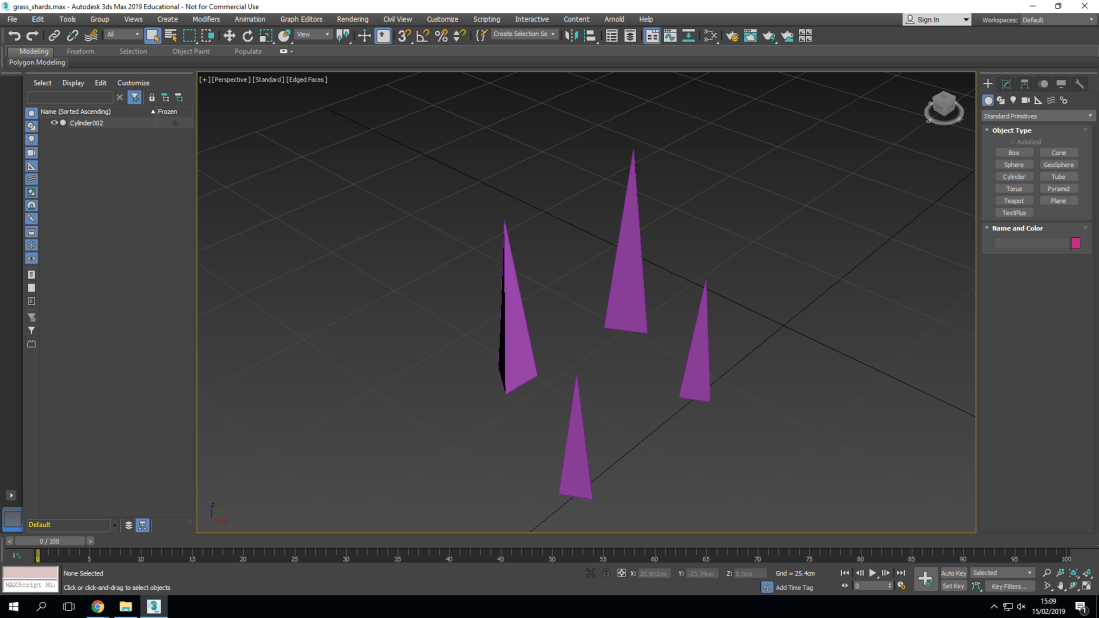
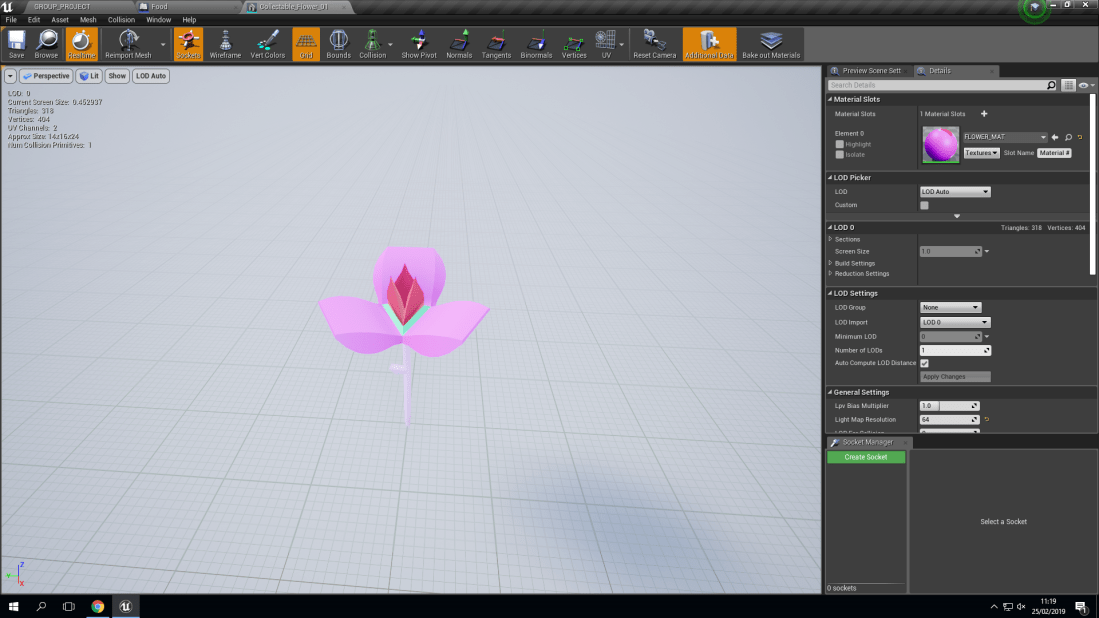
I started of my project by creating different tree’s in 3DS max and seeing which tree I liked most to put in my environment that I was creating here is a screen shot of the tree I created.I also made shards of grass in 3DS max to add more detail to the environment by using foliage I was able to spread them all over the map which would be much more difficult to do manually by dragging and dropping one by one and would have taken up a lot more of my time.This tree model was actually made by another person in my group although I did plan on putting a tree like this in the environment but the tree that I created wasn’t as detailed or as complex so we agreed to put this model of the tree instead of my model that I created. we also planned on putting an animation on the tree and make the edges of the top part of it shake as if wind was blowing the top of the tree side to side to give it more realism and make the environment more lively. But unfortunately we didn’t get to put it in the game because we were running out of time and it wasn’t working well and did not look as good as we hoped it would.By using the models that me and my group made I was able to put together and make this environment which is supposed to be a dense forest.This flower was created by Brendan who also created the more detailed tree this flower has animation where it floats and slowly spins around it is also a collectible so when the player model walks into the collision box the player will gain health.
Evaluation
I set out to create a beautiful and lively environment that would take place in a forest that didn’t have any lore or story but one could be formed the players own ideas.
As a group I have achieved most of my aims I made a nice looking environment that looks quite lively and it really comes together
What did go well was that I was able to create the environment I imagined and I am quite happy with the models that I did create and how they went together well.
Unfortunately what didn’t go well was that we didn’t go was that we didn’t finish the project and we ran out of time there were a few more things that I wanted to add in that I feel would have made the environment much more complete such as a hedge around the map and then trees behind the hedge to make it feel like there is more in the world.
The most important thing that I have learnt from this project and what will help me improve next time is to manage my time properly so I have the time to make the things I need to make and to adjust them so they feel somewhat complete.
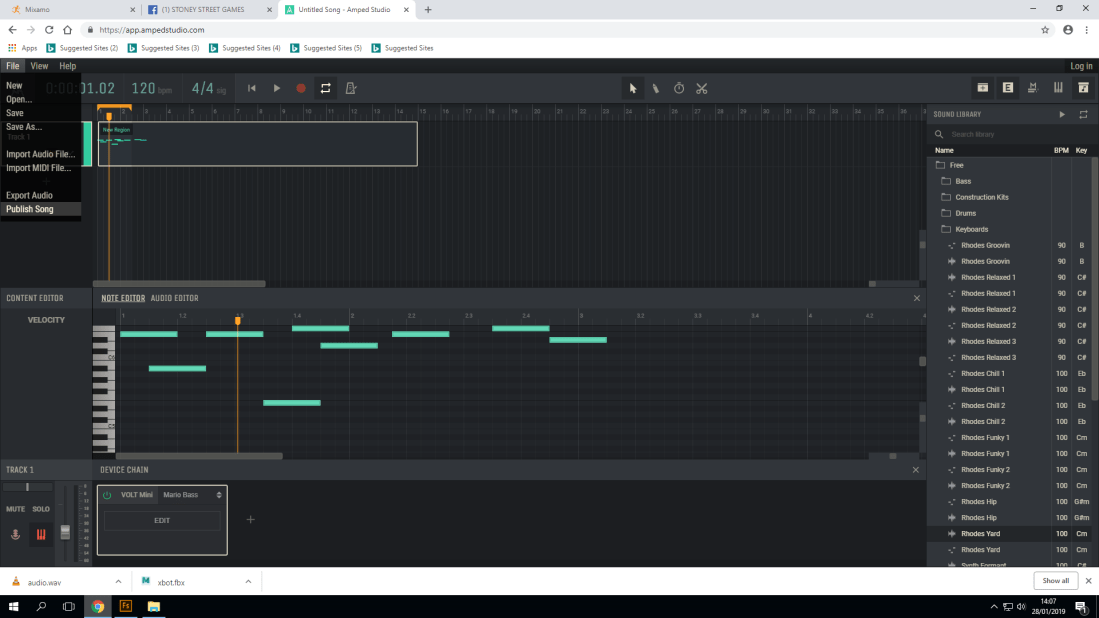
Amped studio is a website where you are able to create beats and music by using different instrumental sounds such as keyboard, base and electronic sounds you are able to change the pitch which essentially means you have an even wider range of sounds and music to make.
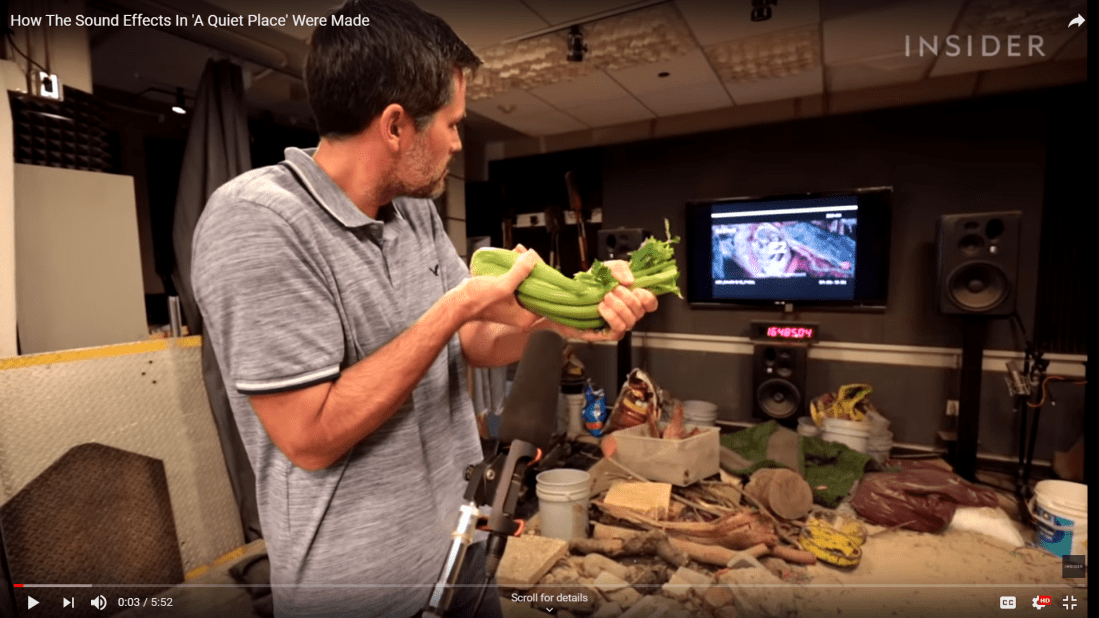
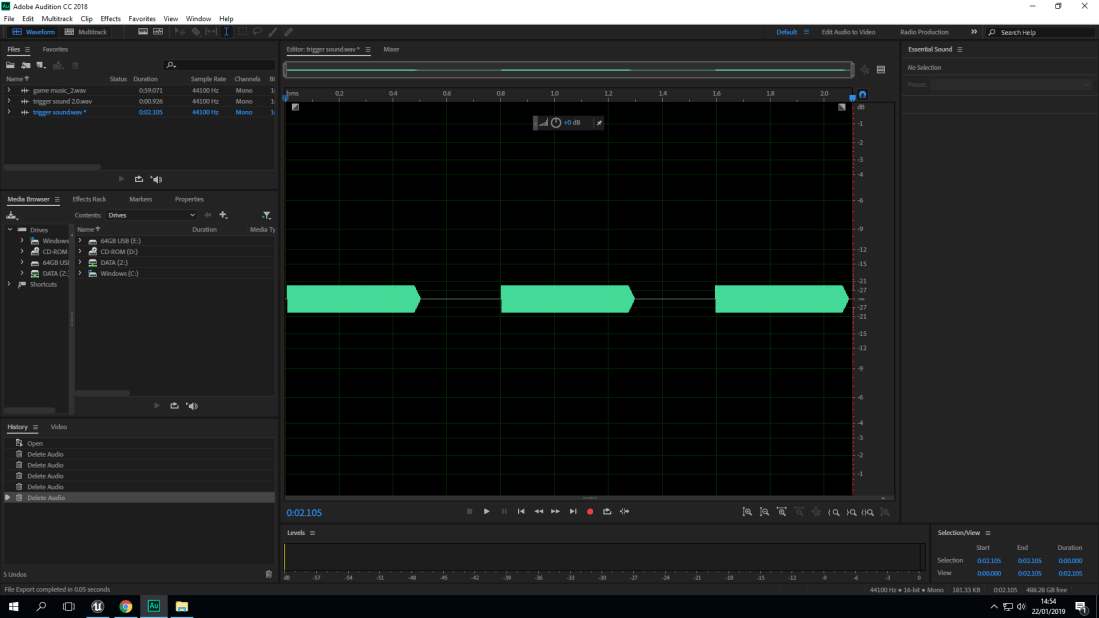
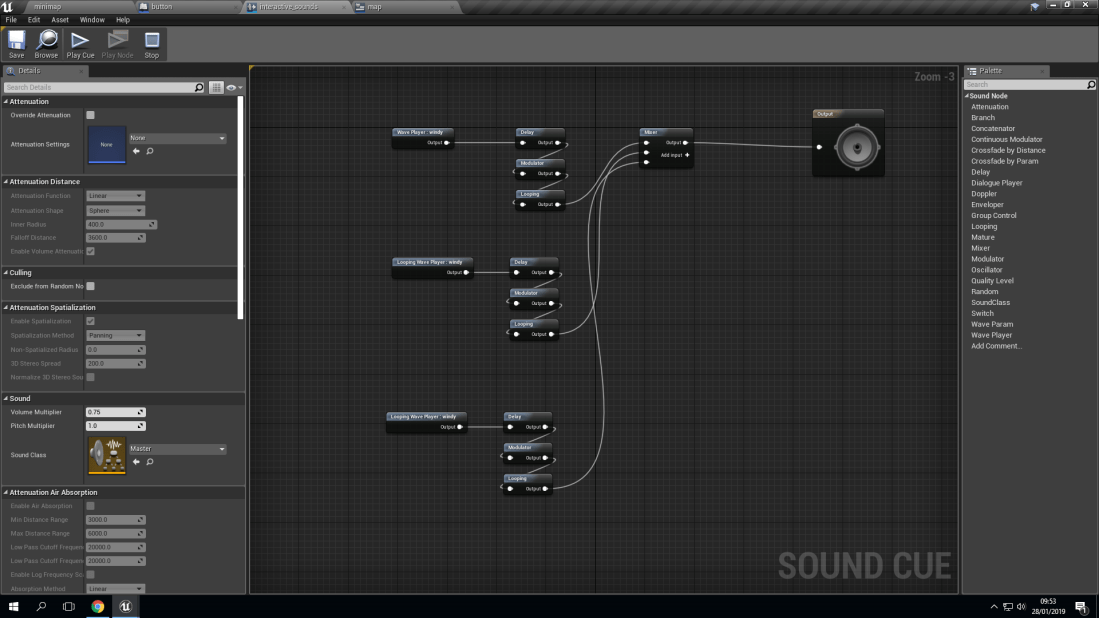
Here is a screenshot of the video that I was watching about sound foley and how sound were made behind the scenes of a movie called A quiet place.I imported this bit of audio from beepbox where I created the sound but because it was looping I got rid of the rest of the audio and kept this section of the audio so it would only play once.Here is a object that when you stand on it it will play a sound.Here is another object but with this one if you walk into it disappear and it will increase your heath bar meter and play a sound.In the background you will be able to hear wind which is actually some blowing in the microphone here is the sound cue for it which shows three different wind sounds of different intensity to make it seem random like real life wind.
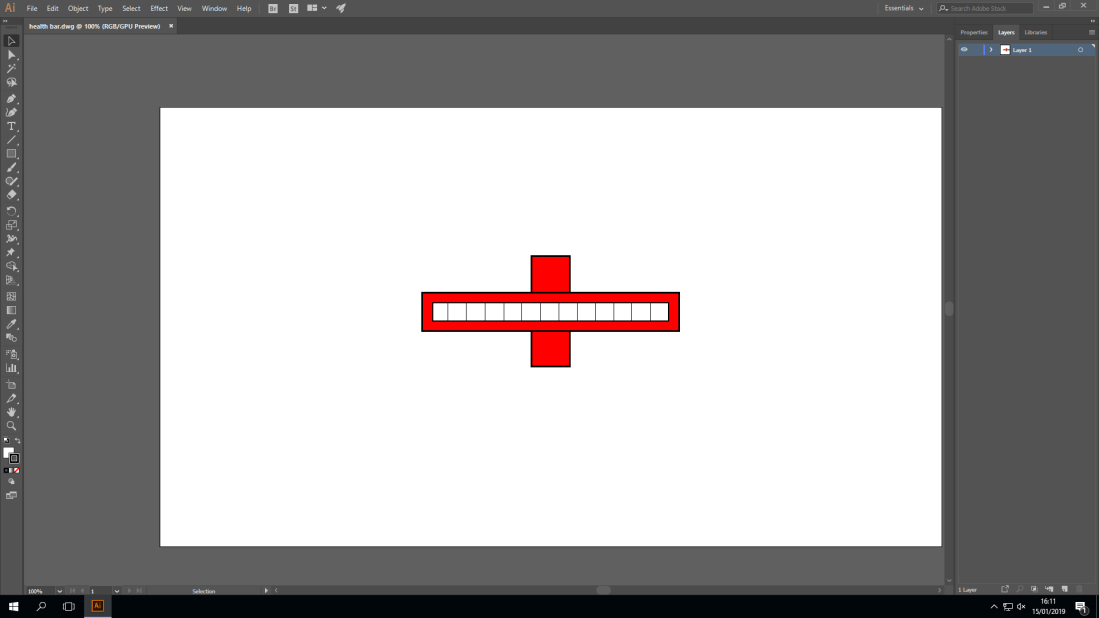
Using the program adobe illustrator and Photoshop I was able to create and import this health bar into my game using different shapes in illustrator I was able to create the health bar and using Photoshop I was able to able to import it.This is what allowed my health in the health bar to go up when my character walked into a box.Just like the mini map I had to put the health bar sprite in the hierarchy in order for to show up on the screen.Here you can see that the health bar is now displayed on the screen with a small green bar inside of it the is because my character has consumed the boxes and the number has add to it’s health.
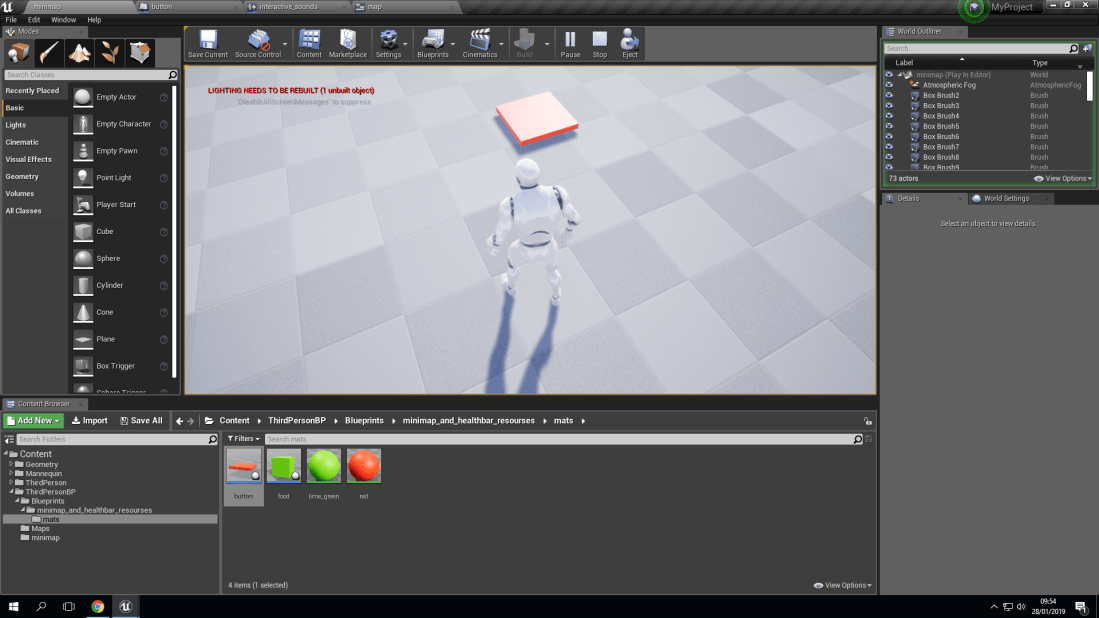
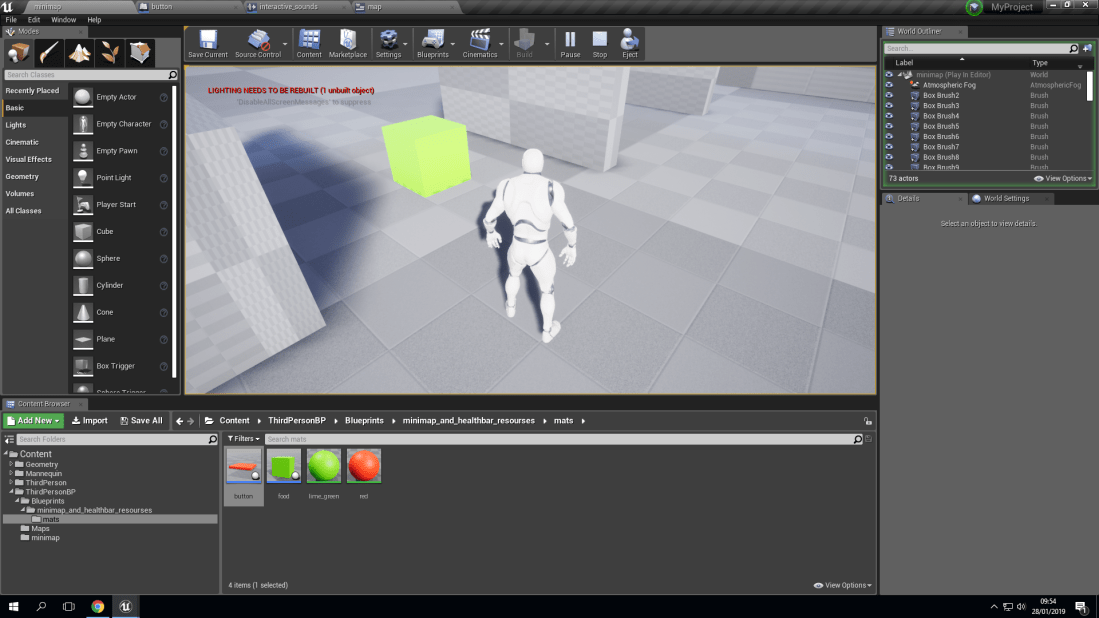
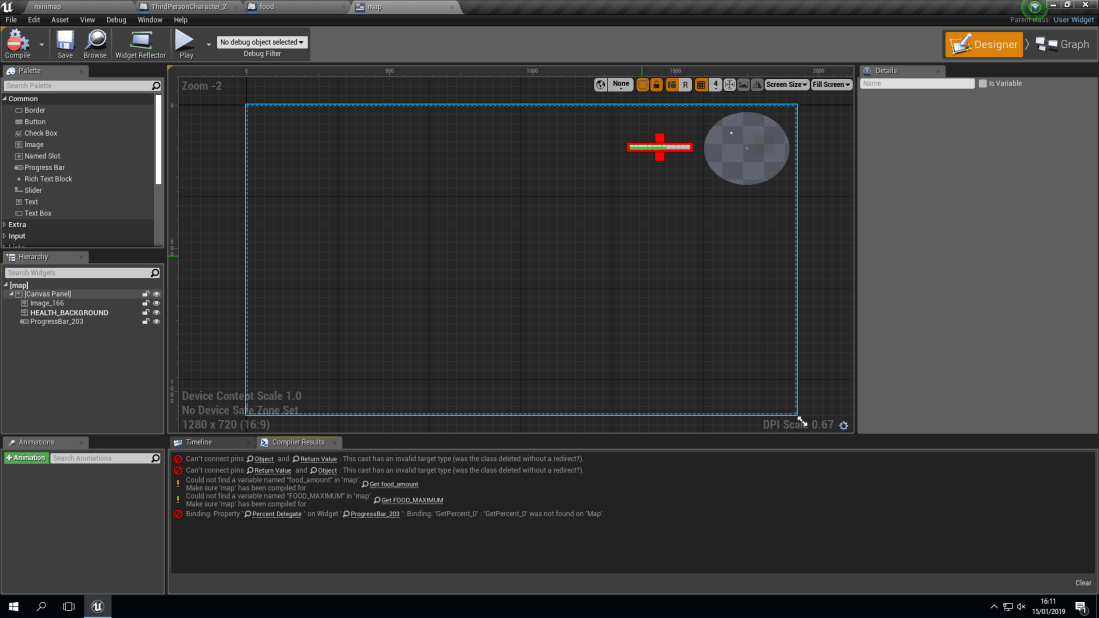
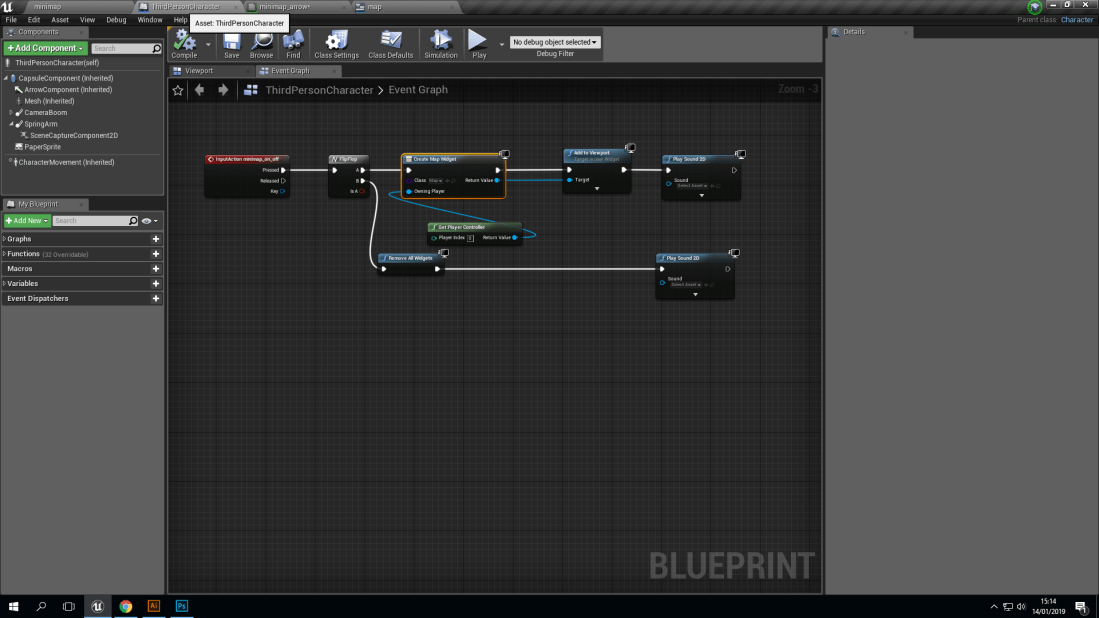
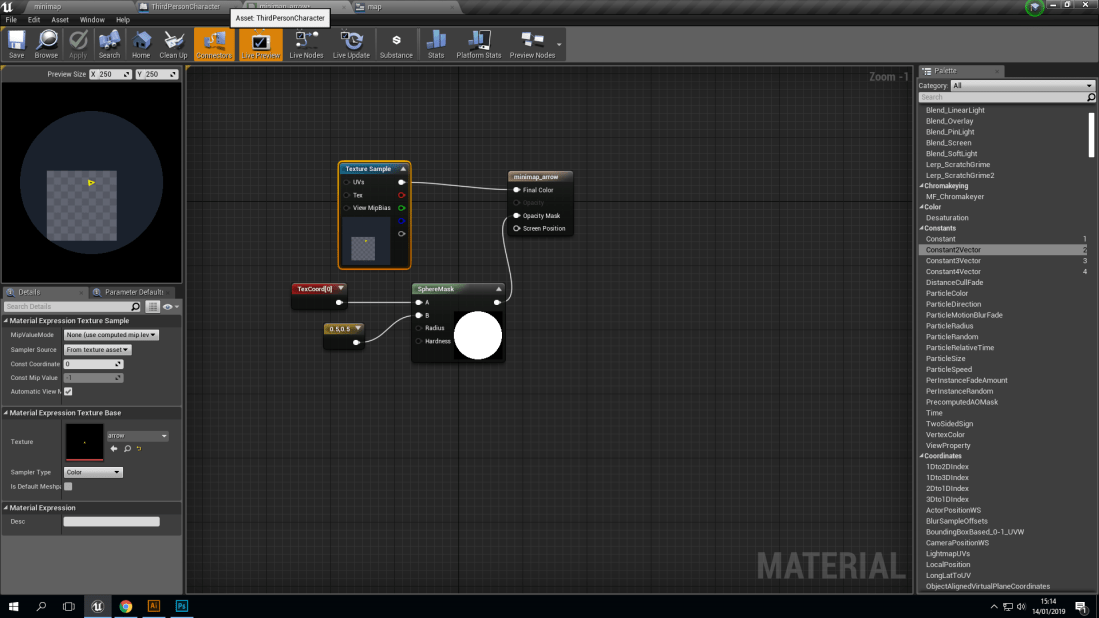
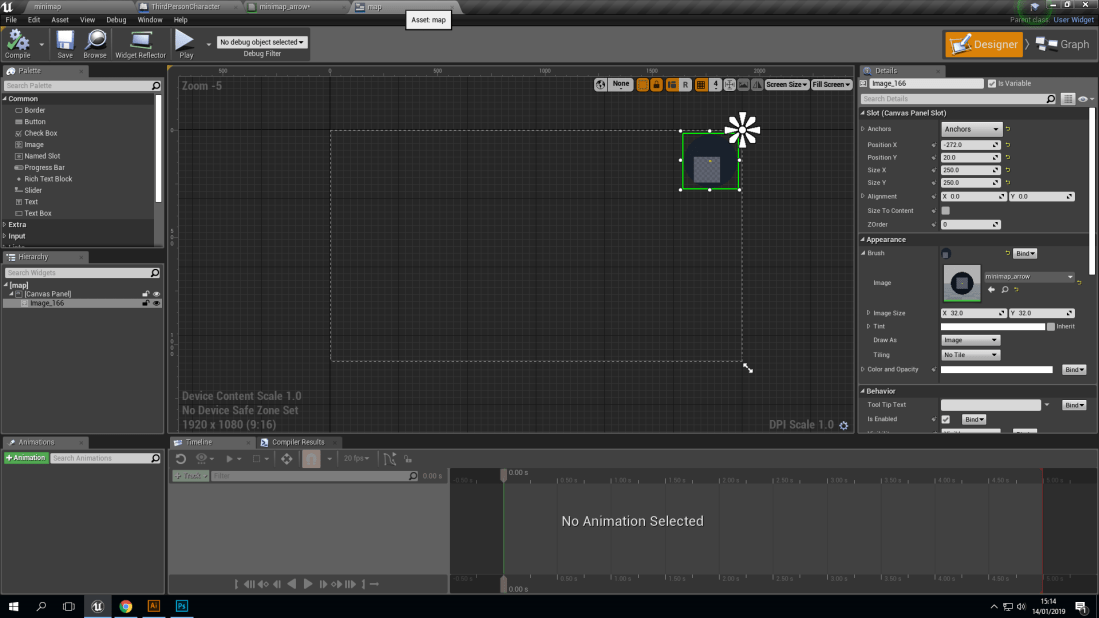
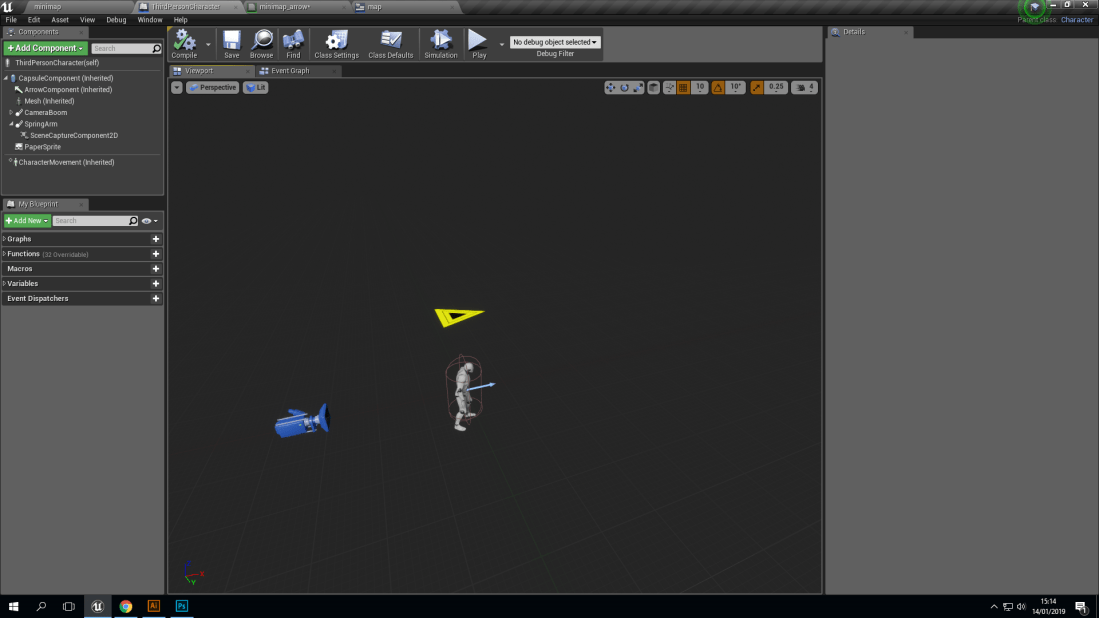
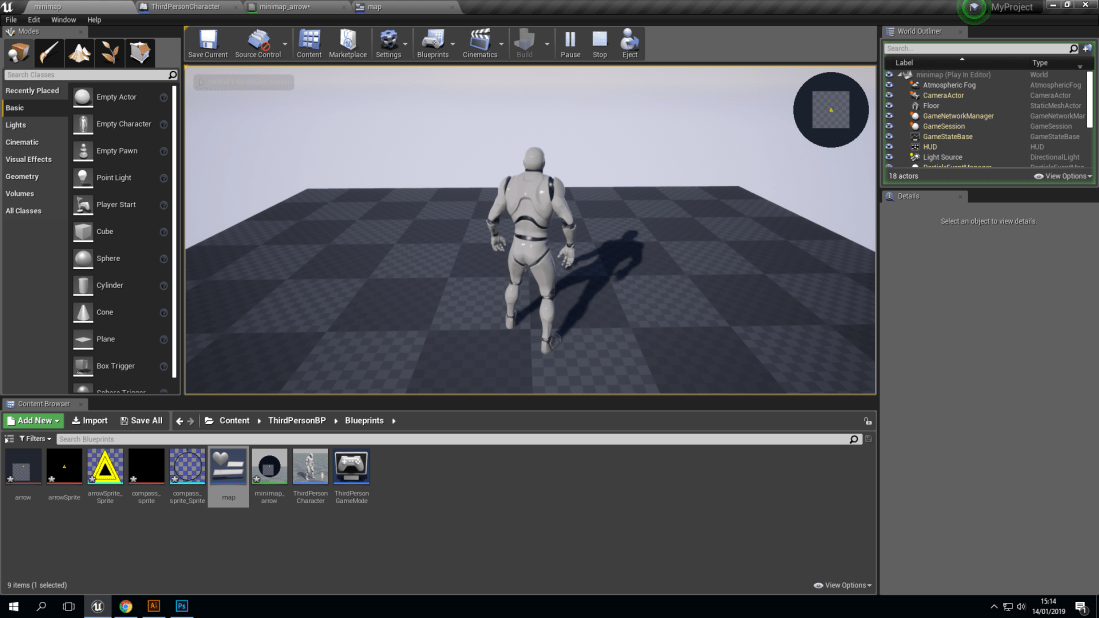
I used engine input to bring up the mini map at will by bonding it to a key of my choice. This blue print was used to make the instructions that allowed me to bring up and put away the mini map. This material controls the display of the render target.This screenshot shows where you can place the mini map on the screen and how big you can make. Here in this screenshot you can see I have placed my arrow screen capture component 2D and spring arm. This screenshot shows the mini map working in the game and I am able to bring it up anytime and put it away.I have put the mini map away.